Garage Door Won’t Open or Close: 15 Reasons and Solutions
Common Causes for Why Your Garage Door Won’t Open or Close With the Remote Control
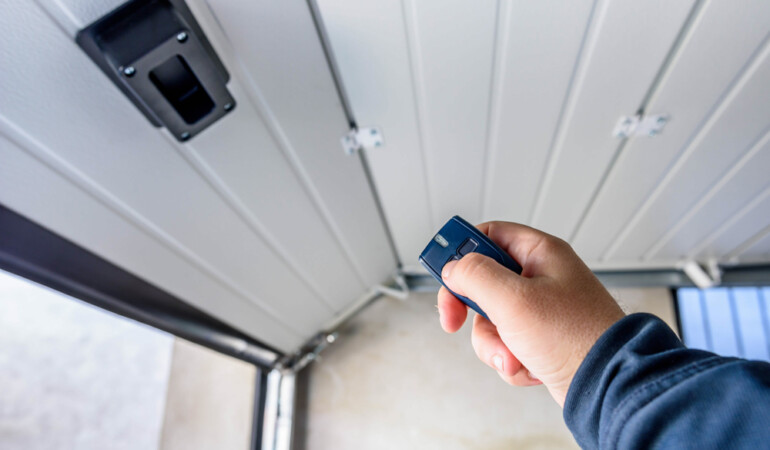
Your garage door is crucial to your home, providing security and easy access to your space. However, frustration can arise when it refuses to open with the remote control. Here, we’ll explore common reasons for this issue and provide practical solutions.
Remote Batteries Are Depleted
Depleted batteries in your garage door remote are one of the simplest yet often overlooked causes. If your remote isn’t working, the first thing to check is the power source. Follow these steps to address the issue:
- Replace the Batteries: Open the remote, and if the batteries look worn out or have been in use for an extended period, replace them with fresh ones.
- Check Polarity: Ensure the batteries are inserted correctly, following the polarity indicated in the battery compartment.
- Remote Signal Strength: If the issue persists, check for any interference or obstructions between the remote and the garage door opener. Sometimes, a weak signal can hinder proper functioning.
The Transmitter Batteries Are Dead
Like the remote, the transmitter – the device mounted on your garage wall – may also have batteries needing attention. Follow these steps to troubleshoot:
- Locate the Transmitter: Find the wall-mounted transmitter inside your garage.
- Replace Batteries: Open the transmitter, and next, if the batteries are dead or low, replace them with new ones.
- Verify Wiring: Ensure that the transmitter is securely connected to the power source. Loose or damaged wiring can cause malfunctions.
The Photo-Eye Is Blocked, Dirty, or Misaligned
The photo-eye is a safety feature that prevents the garage door from closing if an object is detected in its path. If this component is obstructed or misaligned, it can prevent the door from opening. Follow these steps for a solution:
- Inspect Photo-Eye Sensors: Locate the small sensors on either side of the garage door near the ground. Check for any dirt, debris, or misalignment.
- Clean Sensors: Use a soft, clean cloth to wipe away any dirt or debris on the sensors gently. Ensure they are aligned properly.
- Realignment: If the sensors are misaligned, gently adjust them until the indicator lights on each sensor are solid.
The Track Is Not Aligned Properly
A misaligned garage door track can lead to various issues, including difficulty in opening or closing. Follow these steps to address the track alignment:
- Visual Inspection: Examine the tracks on both sides of the garage door. Look for any gaps or misalignments.
- Tighten Bolts and Brackets: Ensure all bolts and brackets securing the tracks are tight and in place.
- Use a Level: Place a level along the tracks to ensure they are perfectly horizontal. Adjust as necessary.
Garage Door Remote or Keypad Aren’t Working Properly
If the remote or keypad isn’t functioning correctly, it could be due to several reasons. Let’s explore how to troubleshoot and resolve this issue:
- Reprogramming the Remote: Follow the instructions in your garage door opener’s manual to reprogram the remote. This often resolves communication issues.
- Check the Circuit Breaker: A tripped circuit breaker can disrupt power to the garage door opener. Locate the breaker in your electrical panel and reset it if necessary.
- Power Interruption to Garage Door Motor: Ensure the garage door motor receives a continuous power supply. Check for any disruptions in the power source.
By addressing these common issues, you can often resolve the problem of your garage door not opening with the remote control.
Remote Needs Reprogramming
Reprogramming your garage door remote can often solve the issue if it seems unresponsive. Follow these steps to ensure your remote is synced correctly with the opener:
- Refer to the Owner’s Manual: Consult your garage door opener’s owner’s manual for specific instructions on reprogramming the remote.
- Access the Program Button: Locate the program button on the opener motor unit. Press and release it; the indicator light should start flashing.
- Reprogram the Remote: Within 30 seconds of pressing the program button, press and hold the button on your remote until the light on the motor unit flashes again. This indicates successful reprogramming.
- Test the Remote: Check if the remote now operates the garage door. If not, repeat the process, ensuring you follow the instructions precisely.
Check the Circuit Breaker that Powers the Opener
A tripped circuit breaker can lead to a loss of power and your garage door openers not working. Follow these steps to check and reset the circuit breaker:
- Locate the Electrical Panel: Find the electrical panel where the circuit breakers are housed in your home.
- Identify the Garage Door Opener Circuit: Look for the circuit labelled for the garage door opener. If it’s in the “off” position, switch it to the “on” position.
- Reset if Necessary: If the breaker is already in the “on” position, flip it to the “off” position and then back to “on” to ensure a full reset.
- Test the Garage Door Opener: Attempt to operate the garage door opener to see if power has been restored.
Power to the Garage Door Motor Has Been Disrupted
If your garage door motor is not receiving power, it won’t function. Follow these steps to address potential power disruptions:
- Check Power Source: Ensure the garage door opener is plugged into a working power outlet. If it’s hardwired, inspect the wiring for any damage.
- Reset the Motor: Some garage door openers have a reset button on the motor unit. Press it to see if it restores power.
- Inspect Extension Cord (if applicable): If an extension cord is used, ensure it’s in good condition and provides a stable power connection.
- Call a Professional: If you’ve checked power sources and the motor remains unresponsive, it may require professional inspection to identify and address internal issues.
Door Control Wiring Malfunction
Wiring issues in the door control system can lead to malfunctions. Follow these steps to troubleshoot and address wiring problems:
- Visual Inspection: Examine the wiring connected to the door control. Look for any visible damage, fraying, or loose connections.
- Tighten and Secure: Ensure all connections are tight and secure. Tighten any loose screws or bolts in the control panel.
- Inspect for Damage: If you find damaged wiring, it may need to be replaced. Consult a professional for rewiring or replacement.
Broken Garage Door Torsion or Extension Springs
Broken springs are a common cause of garage door malfunctions. Follow these steps to identify and address broken torsion or extension springs:
- Visual Inspection: Look above the garage door for a torsion spring or along the sides for extension springs. If they appear broken or stretched, they need replacement.
- Call a Professional: Replacing garage door springs can be dangerous. And it’s recommended to schedule a professional technician to handle the replacement.
The Garage Door Limit Settings Isn’t Set Properly
Incorrect garage door limit settings can cause issues with opening and closing. Follow these steps to adjust the limit settings:
- Access the Limit Setting Controls: Consult your garage door opener’s manual to locate the limit setting controls on the motor unit.
- Adjust the Settings: Use a screwdriver to turn the limit adjustment screws. Turning the screws clockwise increases the up-limit (door opens higher), while counterclockwise increases the down-limit (door closes more).
- Test the Door Operation: Open and close the garage door to ensure it stops at the desired points. Make further adjustments if needed.
Lock Button Engaged
Sometimes, a simple oversight like the lock button being engaged can prevent your garage door from opening. Here’s how to address this issue:
- Locate the Lock Button: Identify the lock button on your garage door opener or remote.
- Disengage the Lock: Press and hold the lock button until the indicator light changes or turns off. This action should unlock the door and allow it to operate normally.
- Test the Door: Attempt to open the garage door to ensure that disengaging the lock button resolved the issue.
Something is Blocking the Remote Signal
Obstructions can interfere with the remote signal, preventing the garage door from responding. Follow these steps to identify and eliminate potential obstacles:
- Inspect the Area: Look around the garage door for any objects or debris that might be obstructing the signal.
- Clear the Path: Remove any items blocking the sensors or the signal transmission between the remote and the garage door opener.
- Check for Interference: Ensure no nearby electronic devices or appliances could disrupt the remote signal.
A Torsion Spring Has Broken
A broken torsion spring is a critical issue that requires immediate attention. Follow these steps to address a broken torsion spring:
- Visual Inspection: Look above the garage door for the torsion spring. Suppose it appears broken or shows signs of damage refrains from attempting to operate the door.
- Do Not Attempt Repair: Repairing or replacing torsion springs is hazardous and should be left to trained professionals. Contact a garage door technician for prompt assistance.
The Disconnect Switch Was Enabled
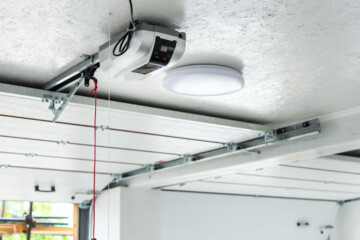
The garage door opener features a disconnect switch for manual operation during power outages or emergencies. If this switch is engaged, it can prevent automatic operation. Follow these steps to address the disconnect switch:
- Locate the Disconnect Switch: Identify the disconnect switch on the garage door opener. It is typically a red cord or knob hanging from the opener rail.
- Disengage the Switch: Pull the disconnect cord or knob to disengage the switch. This allows the garage door to reconnect to the opener for automatic operation.
- Test the Door Operation: Check if the garage door now opens automatically. If not, further troubleshooting may be required.
Garage Door Springs Need Adjustment or Replacement
Misaligned or worn-out springs can affect the smooth operation of your garage door. Follow these steps to address spring issues:
- Visual Inspection: Examine the springs, located above the garage door or along the sides, for signs of wear, misalignment, or damage.
- Call a Professional: Adjusting or replacing garage door springs requires expertise due to the potential risks involved. Contact a qualified technician to assess and address spring-related issues.
Adjust the Opener’s Pulling Force
Adjusting the opener’s pulling force might be necessary if the garage door doesn’t open or close smoothly. Follow these steps to make the necessary adjustments:
- Locate Force Adjustment Controls: Refer to your garage door opener’s manual to find the force adjustment controls on the motor unit.
- Adjust the Force Settings: Use a screwdriver to turn the force adjustment screws. Turning clockwise increases the force, while counterclockwise decreases it.
- Test the Door Operation: Open and close the garage door several times to ensure appropriate force settings. Adjust further if needed for optimal performance.
Up-Limit Switch Needs to Be Moved Closer to the Motor
The up-limit switch is crucial in determining how far the garage door opens. If this switch is incorrectly positioned, it can affect the door’s travel distance. Follow these steps to adjust the up-limit switch:
- Locate the Up-Limit Switch: Refer to your garage door opener’s manual to identify the up-limit switch on the motor unit.
- Adjust the Switch Position: Use a screwdriver to move the up-limit switch closer to the motor carefully. Small adjustments can impact the door’s opening height.
- Test the Door Operation: Open the garage door and observe if it stops at the desired height. Make further adjustments as needed to achieve the correct up-limit.
Check that the Garage Door is Set in its Track
Proper alignment within the tracks is essential for the smooth operation of your garage door. Follow these steps to ensure the door is correctly positioned in its track:
- Visual Inspection: Examine the tracks on both sides of the garage door. Look for any gaps, misalignments, or obstructions.
- Align the Door: If the door appears misaligned, gently guide it back into the tracks. Use caution to avoid causing further damage.
- Tighten Bolts and Brackets: Ensure all bolts and brackets securing the tracks are tight and in place.
- Use a Level: Confirm that the tracks are perfectly horizontal by placing a level along them. Adjust as necessary.
You’ve Misadjusted the Limit Setting on the Garage Door Motion Detector
The limit setting on the garage door motion detector determines how far the door travels during each cycle. If misadjusted, it can lead to operational issues. Follow these steps to correct the limit setting:
- Refer to the Manual: Consult your garage door opener’s manual to locate the limit adjustment controls for the motion detector.
- Adjust the Limit Setting: Use the specified controls to fine-tune the limit setting. Turning the screws clockwise or counterclockwise adjusts the up and down limits.
- Test the Door Operation: Open and close the garage door, ensuring it stops at the desired points. Repeat adjustments until the motion detector is correctly configured.
Garage Door Opener Motor Is Unplugged
If the garage door opener motor is unplugged, it won’t receive power and, consequently, won’t operate. Follow these steps to address a potentially unplugged motor:
- Locate the Power Source: Identify where the garage door opener motor is plugged into an electrical outlet or hardwired.
- Check for Disconnection: Ensure the motor is securely plugged in or connected. If it’s unplugged, reconnect it.
- Power On the Motor: Turn it on if the motor has a power switch. Suppose it doesn’t attempt to operate the garage door to see if power has been restored.
Garage Door Cable Has Snapped
A snapped garage door cable is a serious issue that compromises the door’s balance and safety. Follow these steps to address a snapped cable:
- Do Not Operate the Door: If you suspect a cable has snapped, refrain from operating the garage door. Continuing to use the door can cause further damage.
- Visual Inspection: Look for signs of a broken or loose cable. If you see a cable hanging or notice any fraying, it likely needs replacement.
- Call a Professional: Replacing garage door cables is a complex task best left to professionals. Contact a garage door technician to assess the damage and safely replace the cables.
Garage Door Close-Force Screw Needs Adjustment
The close-force setting on your garage door opener determines the amount of force exerted when closing the door. If the setting is too high, it can cause issues. Follow these steps to adjust the close-force screw:
- Locate the Close-Force Adjustment Controls: Refer to your garage door opener’s manual to find the close-force adjustment screws on the motor unit.
- Adjust the Close-Force Setting: Using a screwdriver, turn the close-force adjustment screws. Turning clockwise increases the force, while counterclockwise decreases it.
- Test the Door Operation: Close the garage door and observe its behaviour. If it closes smoothly without excessive force, the adjustment is successful.
The Door Was Manually Locked
If the garage door is manually locked, it won’t open automatically with the opener. Follow these steps to disengage the manual lock:
- Locate the Manual Lock Mechanism: Check for a manual lock handle or knob on the inside of the garage door.
- Unlock the Door: Turn the handle or knob counterclockwise to unlock the door manually.
- Test the Door Operation: Try opening the garage door with the remote or wall switch to confirm that the manual lock has been disengaged.
The Door Track Is Misaligned
A misaligned door track can cause the garage door to operate unevenly or get stuck. Follow these steps to address a misaligned door track:
- Visual Inspection: Examine the tracks on both sides of the garage door for gaps, misalignments, or obstructions.
- Tighten Bolts and Brackets: Ensure all bolts and brackets securing the tracks are tight and in place.
- Use a Level: Place a level along the tracks to ensure they are perfectly vertical. Adjust as necessary to correct any misalignment.
The Keypad Might Be Out of Sync
If your garage door keypad is out of sync with the opener, it can lead to operational issues. Follow these steps to re-sync the keypad:
- Refer to the Keypad Manual: Consult the manual for your garage door keypad to find instructions on syncing it with the opener.
- Enter the Sync Code: Follow the specified steps to enter the sync code or reprogram the keypad to communicate with the garage door opener.
- Test the Keypad: Enter the access code and check if the garage door responds accordingly. Repeat the syncing process if needed.
Professional Assistance for Garage Door Won’t Open or Close
If you cannot access your garage and the potential solutions appear too complex due to limited skills, knowledge, or time, consider reaching out for professional help. Trust the skilled team at FIX Garage Doors CA for assistance. With our experienced professionals and a comprehensive inventory of parts, we can promptly address various garage door issues.
Explore our garage door diagnostics, inspection service, and available schedule with our repair techs on our website. Feel free to contact us at (905) 247-6699 for toll-free assistance. We offer same-day garage repair service in Toronto and the surrounding GTA areas to ensure your garage opener and door are back in perfect working condition.
Date of page creation: November 20, 2023
Page update date: November 21, 2023


