Choosing the right hinges is the first step in fixing stripped door hinge holes. Consider hinges that match the style and size of your existing ones. Once you’ve made your selection, follow these steps: 1. Remove the Existing Hinges:
Unscrew the old, damaged hinges from the door and door frame.
Carefully lift the door off its hinges and place it on a stable surface.
2. Select Appropriate Replacement Hinges:
Ensure the new hinges have the same hole pattern and size as the old ones.
Consider upgrading to longer hinges if the old ones contributed to the damage.
Choosing hinges that precisely match your door’s style and size is key to effective repair. Whether opting for longer hinges or alternative solutions like dowels or extra-long screws, meticulous alignment is vital for lasting results.
Oleg Chudnovski, SEO
3. Align the New Hinges:
Position the new hinges on the door and frame.
Align them with the existing indentations or marks left by the old hinges.
4. Mark Pilot Holes:
Use a pencil or marker to mark the positions of the new pilot holes.
Ensure the hinge sits flush against the door and frame.
5. Double-Check Alignment:
Confirm that the hinge placement is level and aligns with the door frame.
Adjust the positioning if necessary before proceeding.
Fix the Dowels in Place
Dowels are an effective solution for fixing stripped screw holes in door frames. Follow these steps to secure dowels in place:
1. Measure the Dowel Size:
Choose dowels that match the size of the stripped screw holes.
Measure and mark the length of the dowels needed.
2. Apply Wood Glue:
Apply wood glue to the surface of the dowels.
Ensure even coverage along the entire length.
3. Insert Dowels into Holes:
Press the glue-coated dowels into the stripped screw holes.
Use a hammer to tap them into place gently.
4. Trim Excess Dowel:
Allow the wood glue to dry once the dowels are securely in place.
Trim any excess dowel protruding from the holes using a saw or utility knife.
5. Sand the Surface:
Sand the repaired area to create a smooth and even surface.
This ensures a seamless finish when attaching the new hinges.
Can I Use Extra Long Hinge Screws Instead?
Using extra-long hinge screws is a viable alternative to fixing stripped screw holes. Follow these steps for a secure installation:
1. Select Extra-Long Hinge Screws:
Choose screws that are at least 1/2 inch longer than the original ones.
Ensure the screws are of the appropriate gauge to fit the hinge holes.
2. Align the Hinge:
Position the hinge on the door or frame.
Align it with the existing holes, ensuring a snug fit.
Insert the extra-long screws into the existing holes on the hinge.
Use a screwdriver or power drill to drive the screws in until they are tight.
4. Check for Stability:
Confirm that the hinge is securely fastened to the door or frame.
Test the stability by gently moving the door back and forth.
5. Trim Excess Screw Length:
If necessary, use a saw or utility knife to trim any excess length from the screws.
Ensure a neat and flush finish.
How to Fix Worn Screw Holes?
Worn screw holes can be addressed with simple yet effective solutions. Follow these steps to repair and strengthen the damaged areas:
1. Fill the Holes with Wood Filler:
Apply wood filler to the worn screw holes.
Smooth the filler with a putty knife and let it dry completely.
2. Sand the Surface:
Once the wood filler is dry, sand the surface to create a smooth finish.
Ensure the sanded area is level with the surrounding surface.
3. Drill New Pilot Holes:
Use a drill bit to create new pilot holes in the filled areas.
Choose a bit size that matches the screws for your hinges.
4. Install the Hinges:
Align the hinges with the new pilot holes.
Securely attach the hinges to the door and frame using the appropriate screws.
5. Test Door Movement:
Open and close the door to ensure smooth movement and stability.
Confirm that the repaired screw holes provide adequate support.
By following these step-by-step instructions, you can effectively address stripped door hinge holes and restore the functionality of your door. Each method offers a reliable solution based on your door’s specific needs and the extent of the damage. If the problem can’t be fixed, we recommend contacting specialists for garage door hinge repair or replacement.
Professional Assistance to Fixing Stripped Door Hinge Holes
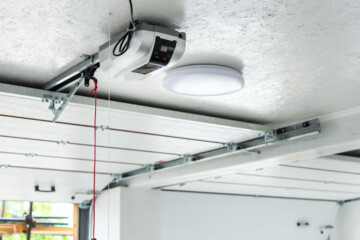
If you’re having problems with your garage door and it seems too hard to fix by yourself, get in touch with the pros at FIX Garage Doors CA. Our skilled team is all set to help with quick and effective solutions using our various parts.
Check out our website to see our garage door diagnostics and inspection services. You can also schedule with our repair technicians. Feel free to call us at (905) 247-6699 for toll-free assistance. We provide same-day garage repair service in Toronto, Barrie, Aurora, Newmarket, and other nearby GTA areas to ensure your garage opener and door are working perfectly again.
Date of page creation: December 07, 2023
Page update date: December 07, 2023
Top Frequently Asked Questions
How do you fix a stripped hole in a hinge?
Fixing a stripped hole in a hinge is a common issue, and there are a few effective solutions: 1. Wooden Dowels:
Insert wooden dowels coated with wood glue into the stripped hole.
Trim excess dowels and sand the surface for a smooth finish.
This method provides a sturdy base for reattaching the hinge.
2. Longer Screws:
Use screws that are longer than the original ones.
Drive the longer screws into the stripped hole, ensuring a secure fit.
Trim any excess screw length for a neat appearance.
3. Wood Filler:
Fill the stripped hole with wood filler.
Once dry, drill new pilot holes and reattach the hinge.
Sand the surface for a level finish.
Do you fix the hinges on the door or frame first?
The order in which you fix hinges to the door and frame can impact the installation process: 1. Attach to the Door First:
It’s generally advisable to attach hinges to the door first.
This allows for easier alignment and adjustment while ensuring the door hangs evenly.
2. Align with the Frame:
Once the hinges are secured to the door, position the door in the frame.
Align the hinges with the corresponding locations on the frame.
3. Secure to the Frame:
With the door properly aligned, secure the hinges to the frame.
Adjust as needed to ensure the door operates smoothly.
How do you fix a misaligned door?
Fixing a misaligned door involves assessing and addressing the root cause of the misalignment. Follow these steps: 1. Check Hinge Alignment:
Examine the hinges to ensure they are securely attached to both the door and frame.
Tighten any loose screws and make necessary adjustments.
2. Evaluate Frame Alignment:
Check the door frame for any warping or shifting.
If the frame is misaligned, consider shimming or adjusting it to create a level surface.
3. Inspect Weather Stripping:
Examine the weather stripping around the door.
Ensure it is not obstructing the door’s movement and adjust or replace it as needed.
4. Adjust Strike Plate:
If the door latch doesn’t align with the strike plate, adjust the plate’s position.
Loosen screws, reposition, and tighten them to achieve proper alignment.
5. Check Hinge Placement:
Confirm that the hinges are correctly positioned on both the door and frame.
Share:
Request A Call Back
To book an appointment or get an estimate, please complete the form below, or call us. We will contact you to confirm. Usual reply time: 3 minutes.