Why the Garage Door Tune Up is Necessary: 9 Steps Guideline
Technically Reviewed by Oleg Chudnovski on Nov 21, 2023 | Written by Fix Appliances CA Editorial Contributors
For most families, the garage is one of the most important areas of the home. It’s used for storage, vehicle parking and, of course, as one of the main entryways to the home. All that daily traffic means that your garage door is subject to a lot of wear and tear over the years.
You can’t prevent parts from wearing out over time, but you can slow down the process by adopting a regular maintenance schedule. That’s right, and your garage door needs a tune-up from time to time, just like your car does. If you’re not sure where to start and how to service a garage door, don’t worry. We will walk you through each of the main steps of a garage door tune-up below.
How to Know When It’s Time For a Garage Door Tune-Up
You may be convinced that a regular tune-up schedule for your garage is a good idea, but how do you know when it’s the right time for servicing garage doors? As a general rule of thumb, you should schedule your garage tune-up every 4 to 6 months, depending on how much use your garage door gets.
A garage door is a heavy piece of equipment, typically weighing between 150 and 200 pounds. It’s also under a lot of pressure from the springs. Any issues must be addressed before they lead to injuries to keep your door operating safely. As we’ve already touched on, a regular maintenance schedule can also extend the usable life of your door.
The 4 to 6-month recommendation is just a guideline. You can advance your schedule if you notice telltale signs of potential issues with your door. These might include:
- An excessive amount of noise when you open and close the door
- Noticeable signs of wear
- The door is hard to open and close
- Your door won’t close without help
- If the door is off-center or doesn’t open evenly
How to Tune Up a Garage Door: Step By Step Guide
One thing you don’t want to do is rush your residential garage door tune-up. Ensure you set aside at least 2 hours to review your maintenance schedule. If you don’t have enough time to spare, reschedule or hire a professional to help with the task.
Also, make sure you have the right tools for the job. Here is a list of common tools you should have on hand before we get into what is included in a garage door tune-up:
- A set of torque wrenches
- Universal hammer
- A pair of locking pliers
- Philips head screwdriver or screw gun
- Surface level and tape measure
- Replacement parts such as weather stripping, bolts, screws and nails
- Lithium grease
- WD-40
Step #1: Disconnect and Secure
Before getting started, ensure your automatic overhead garage door opener is unplugged and disconnected so there’s no chance it might be opened accidentally while you work. If you’re inspecting an open door, even if it’s disconnected from power, it’s a good idea to use a set of locking pliers to prevent it from rolling for safety reasons.
Step #2: Tighten Hinges/Rollers
The hinges and rollers on your garage door constantly move; no matter how well manufactured, they will wear with time. The key is to catch any signs of wear and damage on the rollers or metal fatigue on the hinges early before they lead to the need for major repairs or pose the risk of injury. Make sure any loose nuts and bolts are tightened.
Step #3: Look For a Roller Wear
Look for signs of chips or holes in your rollers that could cause your door to slip off the tracks. Most rollers are made from a durable plastic material, but they won’t last forever. A regular garage door tune-up allows you to catch any signs of worn rollers early so you can replace them before they affect the functionality of your garage door.
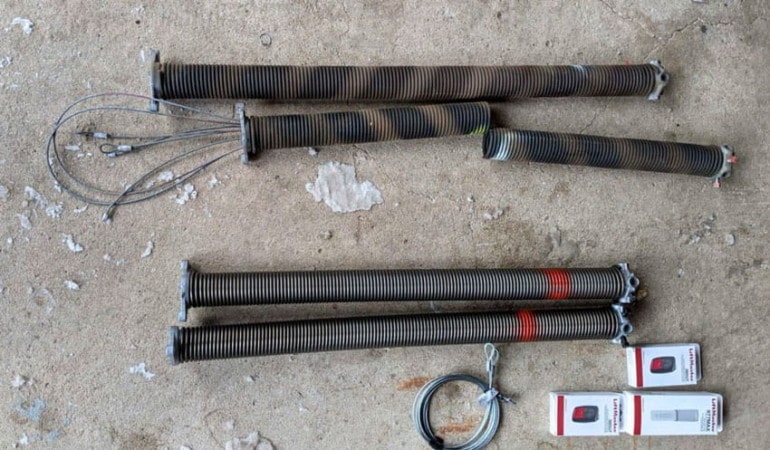
Step #4: Examine Lift Cable and Springs For Wear
The modern garage door is a technological marvel with many moving parts, including the lift cable and springs. If you see any sign of a frayed cable during your inspection, it’s best to replace it immediately. If the cable was to break while in use, it could easily crash down on a vehicle, causing serious damage or injuring a family member.
Inspecting your door’s springs for signs of damage is also important. They’re designed to last for years, but they are under a lot of tension and will begin to show signs of metal fatigue over time.
If they’re exposed to too much water due to a leak, you may also notice signs of rust, and when you do, it’s best to have them replaced as soon as possible. Replacing a garage door spring can be dangerous, so if you’re not confident in your ability to take on the task, it’s always better to seek professional help.
Step #5: lubricate Chain/Screw Rollers and Springs
One of the simplest forms of maintenance is keeping your garage door’s moving parts well-lubricated. When these moving parts are well lubricated, they tend to last longer. For any areas where different metals tend to rub together, white lithium grease is one of the most effective lubricants on the market.
This should be your first choice for lubricating the chain/screw overhead and the rollers. For the spring, WD-40 is an effective lubricant that will reduce noise and help to prevent corrosion.
Step #6: Examine and Replace Worn Weather Stripping
It might not cross your mind when opening your garage door, but the weather stripping along the bottom goes through a ton of abuse. The constant contact with the ground, exposure to the elements and damage from small animals are all things that can limit its lifespan.
That’s why it should make your checklist every time you go through your garage tune-up. Properly installed weather stripping in good shape is important for keeping out the elements and any unwanted critters.
Step #7: Check the Automatic Opener Functionality
As you go through your checklist, don’t forget to include garage door opener tune-up as part of the process. Remember to place an object at the bottom of the door to stop it from closing during your test — your motion sensors located at the bottom on either side of the door should detect the object and automatically reverse your door, moving it back to the open position, signalling that there’s an object in the way that needs to be moved.
Step #8: Check Door Sections and Balance
Don’t forget to look at each panel section of your door for signs of damage or wear. If even one section of your garage door is out of alignment, it can cause your door to become unbalanced. This may cause it to slip off the rollers or make it harder to open and close. Remember to check that the track is aligned properly as well.
Step #9: Final Inspection and Noise Check
Before you complete your tune-up, give it one more final inspection. Test the automatic opener again, and check that the door rolls smoothly in its tracks and that there are no excessive noises that aren’t normal.
Best Options For Servicing Garage Doors
Performing a garage tune-up every few months isn’t for everyone. It can be a bit time-consuming, and there are a lot of different parts to inspect. Also, garage door tune-up costs can increase if you’re uncomfortable with DIY maintenance.
If you’re pressed for time or are concerned you might miss something critical during the inspection, contact Fix Garage Doors CA to set up a professional tune-up from one of our experts.
Our technicians have years of experience servicing and installing garage doors in Toronto and the GTA surrounding area. Our service warranty covers all of our work, and we’re available for same-day appointments. We can be reached by phone at the toll-free number 1-888-242-0777 or by visiting our request service page.
Date of page creation: July 24, 2021
Page update date: November 21, 2023