8 Step Guide of How to Install a Roll Up Garage Door
Technically Reviewed by Oleg Chudnovski on Nov 21, 2023 | Written by Fix Appliances CA Editorial Contributors
Finding and installing the perfect roll-up garage door for your home or business can be complex and labour-intensive. This article will help you organize and understand how to install a sectional roll-up garage door.
Installing a rollup garage door is different from other garage door types, and this article can be used as a guide throughout the process.
Overview of a Roll-Up Garage Door Installation
Unlike traditional sectional garage doors stored on the horizontal surface of the ceiling of your garage, roll-up garage doors coil in on themselves. This process of coiling requires unique panels, mechanics, and installation. The panels of roll-up garage doors are made of smaller slatted panels about 3 inches tall.
One benefit of rollup garage doors is that they are generally made of thicker and more secure material than some other types of garage doors. For example, the metal thickness of rollup garage doors is 18 gauge compared to the common sectional garage door, which is made of thinner 24 gauge metal.
The Best Steps of How to Install a Roll-Up Garage Door
Replacing your current garage door with a roll-up garage door requires safety, materials, tools, and steps you need to follow. Check this detailed guide on framing a roll-up garage door and the step-by-step roll-up garage door installation instructions.
Some of the tools you may need for this installation include:
- Tape measure, levelling tool
- Drills
- Screwdrivers
- Center punch
- Wrenches
- Vice grips
- C-clamps, torque wrench
- Large pipe wrench
- Channel-lock pliers
- Hammer
- Electric drill
- Masonry drill or impact hammer
- Chain hoist and sling
- Scaffolding
Step 1: Check the Roll Up Garage Door Opening
Measuring the opening of the garage door accurately is crucial for your installation. To do this, make sure that you:
- Compare the wall opening measurements with the size of the door
- Check that the head and foot of the door opening are levels
- Make sure door jambs are plumb
- Check that the track is flush with the opening
- Check for all the installation parts
Step 2: Put Door and Parts in Place
The door panels and the parts used for installation need to be placed in the door opening. To do this:
- Clean the floor so that the curtain doesn’t get scratched or damaged.
- Place the left track on the floor so that it is perpendicular to the opening with the track bottom to the left door jamb and the inside top of the building. Repeat this step on the right side of the frame.
- Place all the hardware on the correct sides.
Step 3: Install the Brackets
The brackets hold the panels in place and need to be installed securely when installing the roll-up garage door:
- Make sure the bracket is positioned with the short legend upward.
- The tensioner pawl needs to clear the ratchet wheel.
- The track and the bracket should be aligned where the hooks can be inserted.
- Fit the bracket and track together until the locking tab fits into the place of the notch in the bracket.
Step 4: Raise the Roll Up Door Assembly
Once the brackets and track fit together, it must be raised at the top of the door frame for installation. This step requires two people for proper installation (or replacement.)
- The bottom tracks should be resting facing the door jambs
- Pivot around the jambs as you raise the roll-up assembly into position
Step 5: Attach Tracks and Brackets to Jambs
The track and brackets are now ready for installation into the door jambs. Double-check the position with a level.
- Use fasteners to attach the brackets and the tracks onto the jambs.
- Ensure a minimum of one-inch space at the back and front of the brackets.
- The brackets should be centred on the jamb.
If the jambs of the door opening are made of different materials, you will need more heavy-duty fasteners. The table below details the types of fasteners needed for steel, concrete or filled block, and wood.
| Jamb Material | Fasteners | Drill Size |
| Steel | 1/4 inch by 1-inch TEKS Screw | No drilling necessary |
| Concrete or filled block | 1/4 inch by 1-3/4 inch Powers Wedge-Bolt | Powers 01314 |
| Wood | 1/4 inch by 1-inch Lag Screw | No drilling necessary |
Step 6: Set the Spring Tension
After installing the door panels on the brackets, the spring should be set to the proper tension.
- Rotate the door to the proper tension—usually, about 1.5 revolutions.
- Remember to rotate the spring in the direction that would make the door move downward through the bottom tracks.
Step 7: Secure Head Stop to Tracks
The head stops the roll-up garage door from moving too far and hard into the casing that holds the coiled panels when the door is open. It needs to be attached to the track.
- The head stop can be released from the inside of each track.
- Secure the head stop to the track with a hex screw.
Step 8: Install Stop Clips, Handles, and Rope
Stop clips, handles, and rope are all part of the roll-up garage door opener that needs to be installed.
- Use a carriage bolt and nut to attach the stop clip at the bottom of each bar.
- Install the handles on the outside bottom bar with carriage bolts and nuts.
- Feed the rope through the center hole of the horizontal leg of the bottom bar angle.
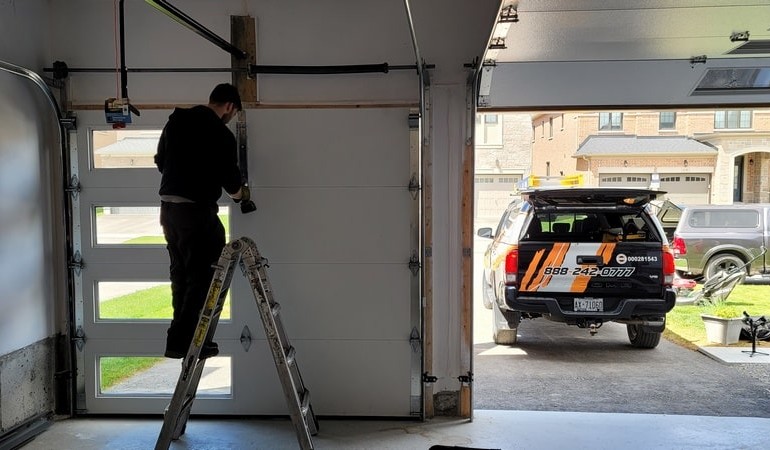
DIY vs Professional Work for Installing Roll-Up Garage Door
Roll-up garage door installation instructions are straightforward but require multiple people to do them correctly. Also, since the door is being pulled up into a coil at the top of the door jab, your measurements must be precise and level. Finally, lifting the heavy door assembly into place is not possible unless you have the correct equipment.
Fix Garage Doors has the experience and equipment to remove old garage doors and correctly install your roll-up garage door the first time. Our fair cost, superior materials, and qualified and trained technicians put safety first and help you avoid injury.
Even though DIY installation is possible with roll-up garage doors, it is better to trust the professionals at Fixgaragedoors with this process. Contact us to replace your broken garage door cable at 905-247-6699 seven days a week for garage door repair in Toronto, Newmarket, Aurora, Vaughan or any of the GTA surrounding areas. You are sure to receive excellent services on the same day.
Date of page creation: May 19, 2021
Page update date: November 21, 2023
You might also like

Mastering the Connection: How to Pair Your Garage Door Opener with Your Car
Belt vs Chain Garage Door Opener: Deciding Between the Two